
MOG 2.0 Challenge Stage α
Challenge Stage – α is much easier than it was in MOG 1.0 because of the addition of evolutions, but it can still be difficult if you don’t prepare beforehand.
Challenge Stage – α is divided into 2 main sections: The First 15 minutes and The Last 15 minutes. These require different preparations to beat, so I highly recommend maxing out your character upgrades and maybe doing a roll on EX Upgrades if you’re still struggling. (EX Upgrades are not necessary, but are very useful.)
Challenge Stage – α is about the same difficulty as Mine – II for the normal enemies; the main difference is that you no longer need to worry about L-Crystals and B-Eaters because they do not spawn in this stage.
There are still projectile launchers, but their bullets are pretty slow and don’t do much damage. Instead, we have some entirely new problems: EXP and RNG. I’ll explain RNG in the next section, so let’s go over EXP first.
You are going to get a maximum of 41 levels during this stage, but most likely you will get less than that. This is because all enemies stop dropping items after 15 minutes. You should only go for 2 Evolutions because it’s difficult to afford 3.
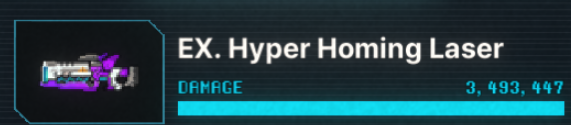
Getting Evolutions is the most important thing here and can make the stage easy if you have the right one. The best one is the Hyper Homing Laser, but getting any of them besides the Sniper one will be very helpful.
In this run, the only evolution I managed to get was Hyper Homing Laser, but it still took me to the end of the fight. I highly recommend getting this if you are struggling, but you might need a few extra weapons for the boss fight.
Your EXP is the most valuable resource at this stage, so you must ensure you aren’t wasting it. This means you must choose only the most useful or powerful weapons and skip modules you normally pick; you do not have the levels to waste on them.
EXP will naturally despawn about 1 minute after they were dropped; this makes it possible to waste them if they aren’t picked up fast enough, and in a stage that already doesn’t give out much EXP, it’s very important to grab all you can.
At this point, you may think that it’s worthwhile to grab the Magnet module to ensure no EXP disappears, but even if you had the levels to afford it, it becomes completely worthless after 15 minutes and should be avoided at all costs. (If you have enough EX Upgrades, you may not need to worry about this.)

The best way to handle EXP is with the Magnet pickups on the ground; these will collect all the coins and EXP that haven’t been despawned. These have the problem of being slightly rare, but they are still the best method while wasting the smallest amount.
If one of these spawns, you should wait next to it for a minute or so, and then pick it up. Even if one doesn’t spawn, the best method is to stand still for a while, then quickly run around the circle of drops, and return to the same spot. It’s not ideal, but it’s much better than doing constant circles and losing your EXP.
If you need to take Defense or Max Health, feel free to do so; these modules can help you in the boss fight. That being said, you don’t always have a choice between items, and to help with this, there are a few strategies to help avoid getting forced into bad items.
The biggest cause of getting weapons or modules you don’t want is Chests. When you pick up a chest, you will randomly get 1, 3, or 5 items, depending on how lucky you are. The main issue is that you do not get to choose which items you get from a chest; it will either upgrade an existing item or give you a completely new one.
To counter this, you will want to only pick up chests if you have all six weapons you want. It’s ok to pick up Chests without full modules; being forced into a bad module isn’t going to ruin your run, but getting a bad weapon might, especially if that weapon blocks you from getting an Evolution.
With learning how to handle EXP and Chests out of the way, we are ready to enter The Last 15 Minutes.
The Last 15 minutes are where you need to prepare against the upcoming waves of enemies and Einkk. Unfortunately, every important method for preparing is RNG-based so let’s talk about those now.
There will be two different RNG-based systems you have no control over. These can easily be the cause of a restart; the first and most significant is Lilith Bombs.

A Lilith Bomb is a potential drop from the normal enemies you have probably seen a lot of by now; they act as a full-screen wipe and will kill every normal enemy without fail. (This includes L-Crystals and B-Eaters, but not bosses.)
The main issue is that you are not guaranteed to get any Lilith Bombs during your run. If you get to 15 minutes without getting at least 1, you need to restart the level and try again, regardless of what modules and weapons you have. Lilith Bombs are 100% necessary to beat this stage because of the second RNG system: I-Drones.

I-Drones are enemies that will start spawning near the edge of the screen at minute 17, and they don’t stop spawning until you have killed the boss. These guys will come from the sky, send out eight bullets, and fly back into the sky. They do not despawn when they are done shooting; you need to kill them or they won’t leave.
The real threat is that they are completely Invincible to all weapons your character can get from leveling up. The only way to kill these guys is to use a Lilith Bomb. We want to use as few Lilith Bombs as possible because, after 15 minutes, they do not spawn anymore.
The main way to deal with these guys is to stand still; if you do not move, their bullets will barely miss you. The game will spawn too many of them to continue dodging their bullets, so you need to do this at some point.
After 15 minutes, Lilith Bombs will not spawn anymore. You need to use at least 1 Lilith Bomb when Einkk spawns or you will be destroyed when you try to dodge her attacks, if you do not get a Lilith Bomb before the 15-minute mark, you need to reset the run.
The RNG starts when you’re waiting for the 30-minute mark; for some reason, you can randomly get hit by their bullets. I have no idea why this is. It’s relatively rare, but don’t be surprised if you take damage. If it happens to you without passive healing, you will start losing health quickly.
This happens much more often when the game is sped up, so the best way to counter this is to Slow the game down to 1x speed. This does not guarantee that you won’t get hit anymore, but it does decrease the chances by a huge amount.
If you do start taking damage, and you have extra Lilith Bombs to spare, you can use one and then collect some hearts around the map and quickly wait next to another Lilith Bomb. This strategy can work, but it’s slightly risky, so I recommend slowing down the game even though it’s going to take longer. (You may have to do both of these strategies if you get unlucky with the bullet spawns.)
With all the preparation out of the way, it’s finally time to fight the Queen of MOG 1.0: Einkk

Einkk’s attack pattern is much easier than Crystal Chamber’s, but she’s still no pushover; her attacks do much more damage than the crystal bullets, so make sure you aren’t hit by any of these.
The boss only has 3 attacks she can do; she will start by shooting a simple X and Cross pattern of bullets from her body, and teleport right next to you before she does this. An easy way to keep track of her is to watch the red arrow near your character; this will always point to her. (It can be hard to see her if she spawns right next to you.)
This is the only attack she will do for phase 1. She will stand still when she’s attacking, so it’s a good time to get some hits in. (X and Cross means all cardinal directions and all diagonals.)
Her last two attacks happen when she reaches half health; she will launch a spiral attack similar to Cinderella to indicate she’s in phase 2 and teleport again. She will return to the X and Cross patterns after this, but she will launch another spiral at the end of each one.
There is also a chance she does another spiral or her third attack, several normal circles. She can do these right after teleporting, so don’t get too close to her. Her attacks are all pretty easy to dodge, but what makes this fight challenging is that every other enemy is still spawning, including the I-Drones.
You need to juggle not getting hit by any of the projectiles sent by the I-Drones or running to the normal enemies. (If you have to choose between getting hit by Einkk or an I-Drone projectile, always choose the I-Drone projectile.)
It wouldn’t be a bad idea to use some Lilith Bombs during the fight if you can afford it, but you only need one to beat the stage. She will repeat these three attacks until you either beat her or you die. (Once again, you can still die even when her death animation is playing.)